Photo: Courtesy of GKN
The new Open Rotor Engine Architecture developed offers reduction in fuel consumption as well as significant noise reduction. Its geometrical complexity results in a design consisting on several subcomponents integrated into a weld assembly. Welding is a critical process, which needs to be evaluated. Nowadays, surface inspection is carried out manually using Fluorescent Penetrant Inspection (FPI). This technique relies on the inspector’s skills and sometimes the complexity of the component can make some areas unreachable, limiting the design of the Open Rotor Engines.
Thermography opens a new paradigm by allowing automation of both the inspection and the detection, eliminating possible human execution errors in defect detection, facilitating testing of any design and enabling faster inspections.
What is active thermography?
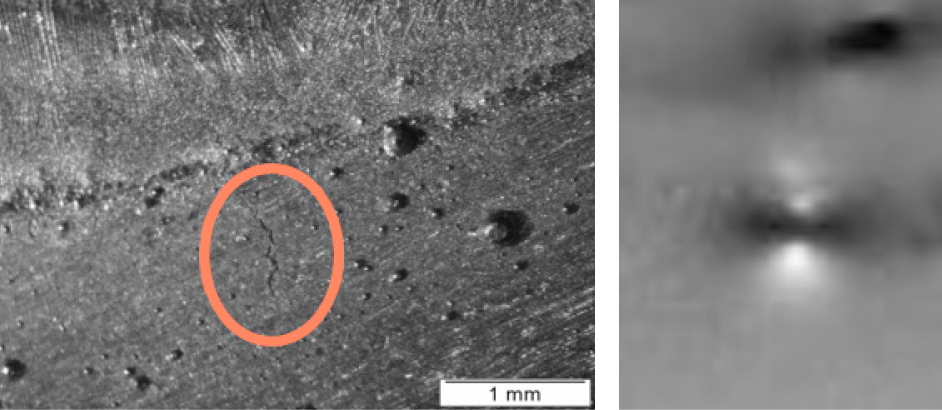
It consists on heating a surface like welds with air, laser, lamps, induction, etc. and examining the heat propagation with a thermal camera. Defects act like barriers for heat propagation and this concentrated heating in the defective areas is directly captured by the camera, allowing the location and sizing of defects after processing the recordings.
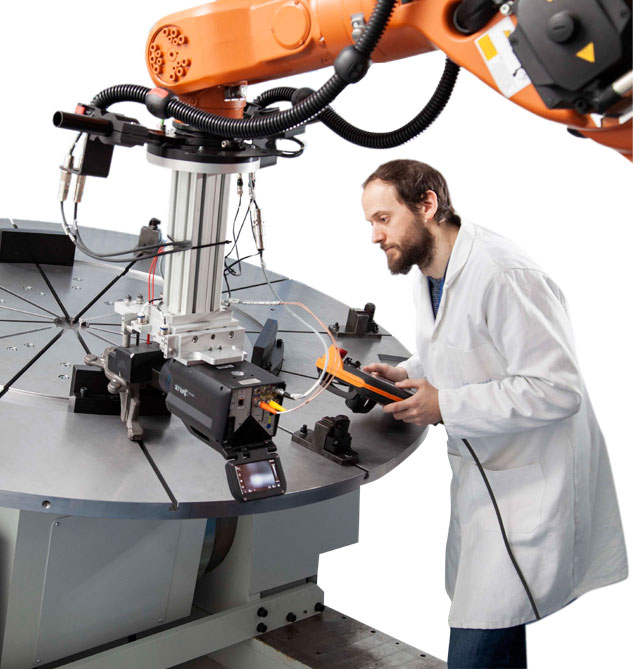
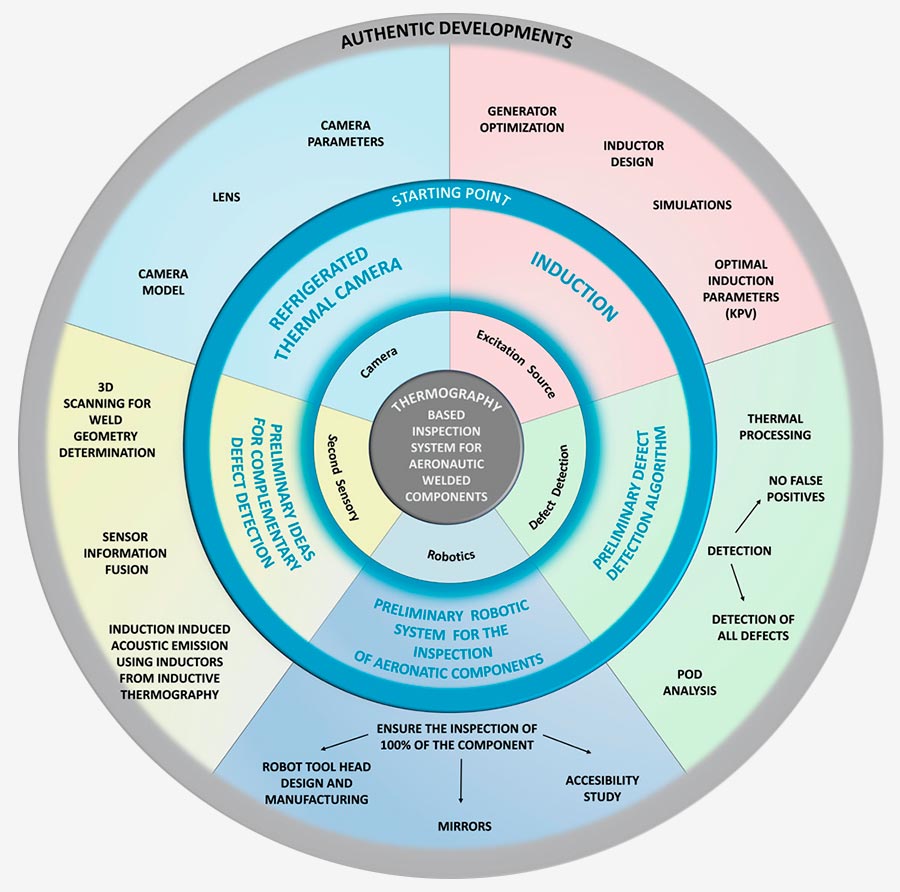
Excitation source
Induction was selected for heating because it makes possible automatic defect detection and design of inductors can be adapted to each geometry. Induction generator will be optimized, several inductors will be designed and manufactured, and simulations will be performed. As a result, Key Process Variables for optimal induction will be achieved.
Camera
A cooled high-end thermal camera will be used. The lens needed to obtain the required resolution to detect the smallest defects will be defined, together with the determination of the camera configuration parameters.
Defect detection
Firstly, thermal processing algorithms will be developed to obtain images enhancing the defects. Finally, detection algorithms will be developed to detect and classify all defects automatically.
Second sensory
It will provide robustness to the inspection system. Two types of sensory will be evaluated: surface scanning with cameras and acoustic emission during welding process. The information gathered from the different sources will be fused to help in the automatic defect detection decision.
Automation of the inspection process – Robotics:
The robotic cell available at LORTEK as well as the robot tool heads will be optimized to achieve a complete inspection through a virtualization process in a CAD-CAM environment. Finally, an interface will be developed to ensure both the thermographic inspection of the whole component and the processing and detection of defects.
- Automation and digitalization of all the inspection process taking steps towards the Smart Factory.
- Productivity increase thanks to faster inspections.
- Incorporation of the inspection system also in maintenance inspections to minimize the engine disassembly.
- Ensure a universal inspection criteria and repeatability of the inspections without depending on the human factor.
- Increase components’ fatigue lifetime by assuring the welded safety components inspection.
- The higher POD will reduce restrictions imposed in the design of the components; thus, optimized engine design will be possible, leading to lighter and aerodynamically more efficient components.
- Reduction of inspection costs associated to a reduction in consumables and resources.
- Reduce CO2 emissions because the higher POD contributes to optimize design of engines towards more aerodynamically efficient ones.
- Avoid the use of polluting substances during NDT testing such as fluorescent penetrants and solvents.
- Healthier working conditions for NDT technicians.
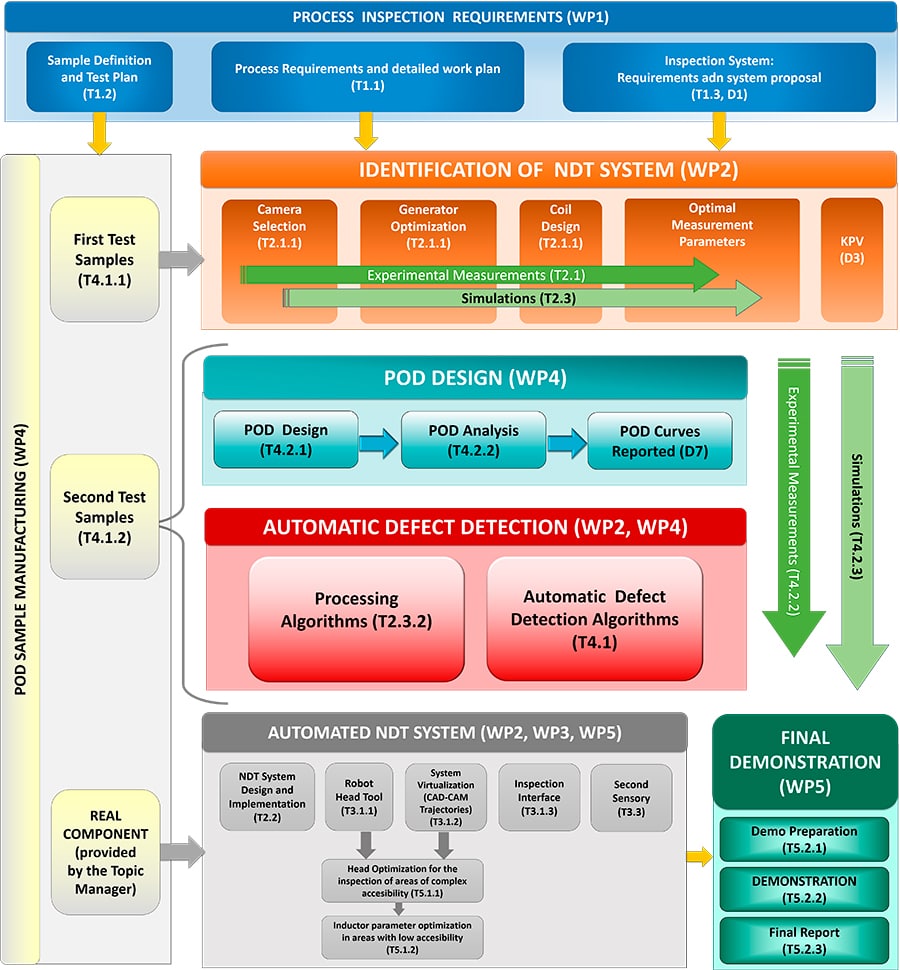
The work plan is divided into 7 WPs – 2cross-cutting WPs (dedicated to Project Management and to Dissemination and Exploitation), and 5 technical WPs – with a duration of 24 months (from 1st January 2021 to 31st December 2022).
- In WP1 the process and inspection requirements for the system are defined.
- WP2 will focus on the complete definition of the NDT system.
- WP3 will address the needed subsystems, including the a complementary sensory, to prepare the system for the inspection of geometrically complex components like a welded safety critical engine component.
- WP4 will be fully dedicated to the Probability of Detection analysis. Additionally, the sensitivity of the automated inductive active thermography will be determined and its results will be compared to the results obtained by traditional inspection techniques (FPI).
- WP5 will be devoted to demonstration activities by inspecting a real component.
AUTHENTIC project will be developed by 4 partners from 4 different countries (Spain, Germany, Austria and Sweden), with complementary skills and experience, covering the whole project value chain. The consortium is built taking advantage of individual expertise of the partners in their corresponding fields of relevance to the project, guaranteeing their complementarity and creating synergies, what is facilitated by former cooperation among the partners.


